Photographing food is harder than it seems. My photos have improved with practice (lots and lots of it). Here are the best tips and tricks I can offer about food photography and equipment.
Please note that some of the links on this page are affiliate links. I only link to products I trust and recommend. Thank you for your support.
Tips for taking great food photos
It’s all about the light! My best tip for beginners is to become aware of the intensity of the light and how it hits the food, and learn to adjust accordingly. Here are some tips for getting started.
- Take photos under natural light. Do not use overhead lights or lamps or your built-in flash. Ever!
- Move around to find the best light source. Don’t feel confined to taking photos in your kitchen. Perhaps the light is best in your bedroom in the morning, and in your living room in the afternoon.
- Try taking photos from multiple angles. Some plates of food look better from above (like, pizza), or from the side (burgers), or at a 45-degree angle (drinks). Try moving around the plate and taking photos at various angles so you can pick your favorite later.
- Minimize clutter. If that spoon, napkin or busy background doesn’t add to the photo, it detracts from the photo. Focus on what is most important, but don’t zoom in so close that viewers can’t tell what the food is.
Troubleshooting common food photography issues
Frustrated by how your food photos are turning out? Read on for potential solutions.
- Your photos are blurry. Blurry photos are caused by camera shake. Solutions include: 1) hold your camera steadier (easier said than done), 2) use a tripod with a remote so your camera stays completely still while you’re shooting, 3) use a faster shutter speed, which will require opening up your aperture and/or moving to an area with more light, or 4) raise your ISO to decrease the amount of light needed (this will reduce image quality, however).
- Your colors aren’t true to life. When you’re editing your photos, if your plate of food looks very blue, yellow, pink or green, use your software’s white balance tools to fix it! Colors come alive when the white balance is set properly. If you shoot in RAW format, you’ll have an easier time adjusting color balance later.
- Your photos just don’t “pop” like professional food photos. Experienced food photographers use lenses that allow them to narrow their depth of field to highlight the subject of the photo. Then they use photography software to tweak the contrast, levels and sharpness of their photos. Sometimes a few little edits can really make a photo pop.
Read on for relatively inexpensive lens and software recommendations that can help you solve these problems and take amazing food photos.
Cameras for food photography
 You don’t necessarily need a fancy camera to take appealing food photos. You can probably get by with a point-and-shoot camera for a while. Consult the user manual, use the macro setting and practice!
When you are ready to have full control over your exposure and focal length, save up for a DSLR camera (that’s short for digital single-lens reflex camera). It’s an investment, truly! I typically upgrade my camera about every four years, and currently use a Nikon Z6. It’s amazing.
If you can’t decide between a Nikon DSLR or Canon DSLR, the differences between the two are pretty minimal. Comparable models will produce photos of comparable quality, so choose the best camera available in your price range.
Before you buy, read reviews and go to a local photography store to try them out in person. If one brand’s cameras seem more user-friendly and feel more comfortable in your hand, go for that one. The lens you use for food photos will have more of an impact than the dSLR itself, so I recommend buying the camera body and lens separately.
Lenses for food photography
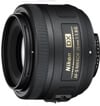 I prefer to use compact fixed lenses. Fixed means that the lenses do not zoom in or out, so I have to physically move myself closer or farther away from the subject.
I love fixed lenses because they are generally smaller, cheaper and faster than zoom lenses. They often offer wider apertures, which gives me greater control over depth of field and more flexibility while I’m shooting.
On my old cropped format camera, I used Nikon’s 35mm f1.8 and loved it. It produced sharper photos than my old 50mm and was easy enough to use for overhead photos of food on my table.
Now that I’ve upgraded to an expensive full-frame camera, I primarily use Nikon’s Nikkor Z 50mm f1.8 lens. This lens is designed specifically for Nikon’s Z-format cameras. If you have one of Nikon’s other full-format cameras, I’d recommend the 50mm f1.4 lens (the 50mm f1.8G lens is almost as good).
But wait, why did I move to a longer focal length when I upgraded cameras? Because a 35mm lens on a cropped format camera effectively acts as a 50mm lens on a full-frame camera. It’s confusing, I know. Unless you’ve spent thousands of dollars on a camera, your camera is probably a cropped format, but double-check to be sure.
Other photography equipment
 Reflectors and diffusers: I mostly use cheap white foam boards to bounce light back onto the plate and reduce shadows. You can also bring out more shadows by using a black foam board. I buy my foam boards at craft stores or Target. Sometimes I hang sheer white fabric over the window to soften the lighting source, too.
 Quality tripod: I prefer to shoot with my camera in my hands for maximum freedom, but I’ve finally conceded that my tripod gives me greater control over my settings and helps ensure a super high quality (not grainy or blurry) photograph. To shoot my cookbook, I bought the Manfrotto Studio Pro Triman Tripod and a sturdy arm that lets me shoot overhead. I LOVE this setup!
You’ll probably need to get a tripod head for your tripod, too—I opted for the Manfrotto 322RC2 Joystick Head Short, which is so much easier to adjust than other tripod heads. Just one trigger instead of three knobs!
Recommended photography software
 I use Adobe Lightroom to organize and edit my digital photos. I don’t know what I would do without it! I prefer it to Photoshop because it helps me keep my files organized and easy to find, and provides exceptional control over exposure adjustments. It is also significantly less expensive than Photoshop.
Recommended photography books
 Pinch of Yum Tasty Food Photography eBook: A solid eBook about food photography (with videos!) by food blogger Lindsey of Pinch of Yum. She provides technical camera setting advice, composition tips, lighting tips, props and setup details, and photo editing and workflow tips.
The best part? You can watch videos of Lindsey shooting and editing photos, which are really helpful. Click here to purchase and download the Pinch of Yum Tasty Food Photography eBook for $29.
 Understanding Exposure by Brian Peterson: If you really want to understand the fundamentals of photography, I recommend this book! The principles taught in this book can be applied to all photography situations.
Where to buy food photo props
Before you go prop shopping, think about what you want your style to be so you don’t waste your money on props that aren’t “you.” If you’re not sure what your photography style is yet, look to your wardrobe, décor and Pinterest boards for clues. Are you drawn to bright and colorful patterns, or clean lines and muted tones? Shop accordingly.
You don’t need a closet full of props for interesting food photos. You probably already have items at home that will look great in photos. Get creative! Vintage handkerchiefs can make fun napkins and well-worn baking sheets can make an interesting background.
Thrift stores and my parents’ kitchen have yielded some of my favorite finds. Etsy and eBay are treasure troves for unique, handmade or vintage food photo props. My favorite shops for new props and useful cooking tools are Crate and Barrel, West Elm, CB2, Williams-Sonoma, Sur la Table, Anthropologie, Target and Amazon.
More resources on Cookie and Kate
Additional food photography resources
- Principles of Photography series by White on Rice Couple
- Language of Photography Series by Gourmande in the Kitchen
- 12 Things That Have Helped My Food Photography by Bojon Gourmet
- 15 Essential Food Photography Tips from Andrew Scrivani
- Smitten Kitchen’s Approach to Food Photos
- Current Food Photography Styles and Trends: A Case Study by Stephanie Shih
- $15 Food Photography Lighting Set-up by Taylor Mathis
- 10 Affordable Everyday Food Photography Backgrounds by A Beautiful Plate
- 10 Household Tools That Can Improve Your Food Photography by Pinch of Yum
- How to Garnish Foods on How Stuff Works
- Todd Coleman’s Food Photography Tips
Questions? Feel free to leave them in the comments section below.